
Updated August 2026
Fact-checked by the MyFinancial101 editorial team
Your car throws a check-engine light on a Tuesday, the repair quote comes in at $800, and your checking account has $212 in it. That specific scenario is where the decision to build an emergency fund on a tight budget stops being abstract financial advice and becomes genuinely urgent. Most people know they need a cushion. The harder part is finding the money when every paycheck already has a destination. A three-month fund is a realistic target even for households where cash is genuinely scarce, and this guide is built around that reality, not an idealized budget.
The numbers tell a sobering story. According to the Federal Reserve’s 2024 Report on the Economic Well-Being of U.S. Households, only 55 percent of U.S. adults had set aside enough money to cover three months of expenses. That means nearly half of American adults are one bad month away from a real financial crisis. Bankrate’s 2026 survey data found that 24 percent of Americans have no emergency savings at all. These figures reflect the reality that many households are already operating on a razor’s edge, with little margin for unexpected costs.
By the time you finish reading, you’ll know exactly how to calculate a realistic savings target based on your actual expenses, which systems will keep contributions moving even when motivation fades, and how to handle the messy real-world situations, irregular income, debt payments, and life changes, that most guides gloss over. The goal is a three-month fund you can actually reach, not a theoretical one that makes you feel worse for not having it.
Key Takeaways
- Only 46 percent of Americans have enough emergency savings to cover three months of expenses, according to Bankrate’s 2026 Annual Emergency Savings Report survey.
- A starter goal of $500 to $1,000 is more effective than aiming for the full amount immediately; behavioral research shows smaller milestones drive higher completion rates.
- Saving just $10 per week adds up to more than $520 in a year, real protection against common financial shocks with zero lifestyle overhaul required.
- Three months of bare-bones expenses is a defensible target for most households; six months is ideal, but three months covers the median unemployment spell for many entry-level and service-sector workers.
- High-yield savings accounts currently available in 2026 still offer rates that outpace basic checking accounts while keeping your money fully liquid and FDIC-insured up to $250,000.
- Employer tools like direct-deposit splits and certain earned-wage access apps can automate savings even for workers with irregular or shift-based paychecks.
In This Guide
- Is Three Months Really Enough?
- What Are Your True Bare-Bones Expenses?
- Setting Smaller Milestones That You’ll Actually Hit
- Finding Extra Dollars Without Extreme Sacrifices
- Building Systems That Make Saving Automatic
- Where to Park the Money Safely
- Balancing Debt Payments and Emergency Savings
- Staying Consistent When Motivation Drops
- When Your Target Number Changes
Is Three Months Really Enough?
Six months of expenses is the gold-standard recommendation, and for good reason: it provides a longer runway for job searches, medical recoveries, or overlapping crises. But for someone working a service-sector job, raising kids on one income, or carrying credit card debt, six months can feel so distant that it triggers paralysis rather than action. Three months is not a compromise. It is a practical, well-supported target for most financial situations.
Three months of bare-bones savings covers the median unemployment spell for a large share of entry-level and service-sector workers. It absorbs common shocks: an unexpected car repair, a medical co-pay, a month of reduced hours after an illness. For dual-income households, three months is arguably sufficient because the odds of both earners losing income simultaneously are much lower than one person losing theirs alone.
Who Can Justify Three Months (and Who Should Push for More)
Single-income households with dependents, workers in highly volatile industries like construction or hospitality, and anyone with a chronic health condition should view three months as the minimum and work toward five or six when the three-month fund is stable. Reaching three months first is still the right move. A partial fund you actually have beats a theoretical six-month fund you never build. Start with the target you can reach; expand it from a position of strength.
One honest limitation: this approach will not work well if your bare-bones expenses are completely consumed by fixed obligations with zero flex. If 100 percent of your take-home pay already goes to rent, minimum debt payments, and utilities with nothing left for food, no amount of system-building or milestone-setting changes the math. In that case, the first step is not saving. It is a direct conversation with a nonprofit credit counselor or a benefits eligibility review. Saving $10 a week from a budget that is already $150 in the red each month is not discipline. It is arithmetic that does not add up. Acknowledging that truth keeps this guide grounded, not aspirational.
According to Bankrate’s 2026 Annual Emergency Savings Report survey, 24 percent of Americans have no emergency savings at all. Even a $500 starter fund puts you ahead of roughly one in four adults in the country.
What Are Your True Bare-Bones Expenses?
The single most common mistake people make when setting an emergency fund target is using their full monthly spending as the baseline. Your emergency fund is not meant to preserve your current lifestyle during a crisis. It is meant to cover the essentials while you recover. That distinction changes the number significantly, and often makes the goal feel far more reachable.
Pull three to six months of bank and credit card statements. Go line by line and categorize spending into two columns: needs and everything else. Needs include rent or mortgage, minimum utility bills, groceries at a conservative figure, transportation costs (car payment, insurance, gas, or transit passes), health insurance premiums, and minimum debt payments. Everything else, streaming services, dining out, gym memberships, subscriptions, does not belong in your emergency baseline.
Adjusting for Irregular and Seasonal Costs
Some costs don’t show up every month: car registration, annual insurance premiums, back-to-school expenses. Divide any known annual costs by 12 and add that monthly average to your baseline. For irregular costs, use the highest recent month as a conservative estimate rather than an average. A slightly higher target is better than a fund that runs short when a real emergency hits. Once you’ve built this number, multiply by three. That’s your target.
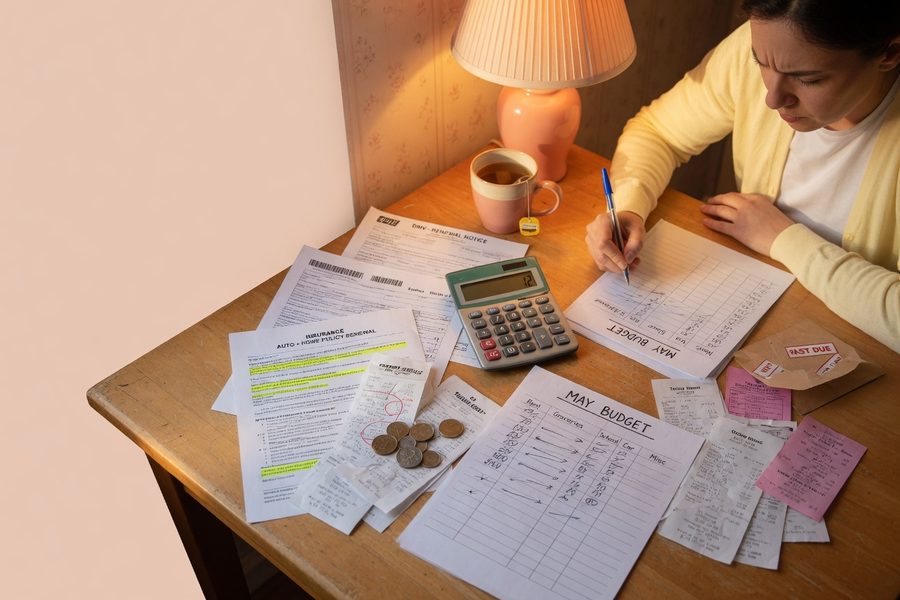
Here’s a simple worked example. Suppose your bare-bones monthly expenses total $2,400: $1,100 rent, $150 utilities, $350 groceries, $300 transportation (car payment + gas + insurance), $200 health insurance, and $300 minimum debt payments. Your three-month target is $7,200. Saving $55 per week gets you there in roughly 130 weeks, about two and a half years. Saving $138 per week gets you there in one year. Knowing that number precisely tells you exactly how much per paycheck you need to redirect, which is far more useful than a vague instruction to “save more.”
Setting Smaller Milestones That You’ll Actually Hit
Staring at a $7,200 target when your savings account holds $0 is discouraging in a way that’s genuinely counterproductive. Behavioral research consistently shows that people complete savings goals at higher rates when they break large targets into smaller, visible milestones. The first milestone should feel winnable within 60 to 90 days.
A starter emergency fund of $500 to $1,000 is the right first checkpoint for most people. That amount handles a mid-range car repair, a medical co-pay, or a broken appliance without touching a credit card. Once you’ve hit $1,000, you’ve also built proof of concept: you know what weekly or bi-weekly amount works for your cash flow, which systems help, and which obstacles tend to derail you. That knowledge is worth as much as the money.
Breaking the Goal Into Weekly Targets
Work backward from your three-month target and your realistic timeline. If you want to reach the full amount in 18 months, divide the total by 78 weeks. For a $7,200 goal, that’s roughly $92 per week, or about $46 per paycheck on a bi-weekly schedule. If $92 per week is currently impossible, then 24 months ($69 per week) or 30 months ($55 per week) is your plan. There is no shame in a longer timeline; the only version that fails is the one where you don’t start.
Set your first milestone at $500, then celebrate in a way that costs almost nothing, a free museum day, a home-cooked meal you love, or anything that feels like a real reward. That small acknowledgment reinforces the behavior and makes the next milestone feel achievable.
Finding Extra Dollars Without Extreme Sacrifices
Most personal finance articles at this point tell you to cancel Netflix and stop buying coffee. That advice isn’t wrong, but it’s incomplete and a little condescending for households that have already trimmed obvious expenses. A more useful approach is a systematic audit of spending that surfaces costs you genuinely forgot about, and a realistic look at small income additions that don’t require a second full-time job.
The Subscription and Recurring-Cost Audit
Pull up your last two months of bank and credit card statements and look specifically for charges between $5 and $30. These are the ones that auto-renew without registering consciously. App subscriptions, gym memberships you use twice a month, cloud storage you’re paying for twice on two different services, premium tiers of free apps, these are common and easy to cut. A single audit often surfaces $40 to $80 in monthly charges that were genuinely forgotten. Cancel or downgrade anything you haven’t actively used in 30 days.
On the grocery side, coupon stacking strategies have become significantly more accessible through apps, and shifting even two dinners per week toward cheaper protein sources (eggs, legumes, canned fish) can free up $30 to $50 per month without eating differently in ways that feel like deprivation.
Low-Effort Income Additions
Selling items you no longer use is the fastest zero-investment cash source. Electronics, clothing, furniture, and kids’ gear move quickly on Facebook Marketplace and similar platforms. A few hours on a weekend can generate $100 to $300 that goes directly toward your first milestone. For ongoing income, micro-freelancing platforms have expanded significantly and now include short tasks that fit around irregular schedules. If you have a specific skill, writing, data entry, photography, tutoring, even occasional gig work adds meaningful dollars over a quarter.
One angle that most emergency fund guides miss entirely: if you or someone in your household qualifies for programs like SNAP, claiming those benefits frees up grocery dollars that can be redirected to savings. The 2026 poverty guideline updates expanded eligibility for several federal programs, so it’s worth checking current thresholds if you’ve been on the edge before. Using available benefits is not a detour from financial progress. It is part of the same plan.
Saving $10 per week compounds to more than $520 in a year with zero lifestyle overhaul. At a high-yield savings rate of 4.5% APY, that same weekly habit generates roughly $535 after 12 months, the full starter emergency fund milestone, almost on autopilot.
Building Systems That Make Saving Automatic
Willpower is a depletable resource, which is why savings systems that don’t require a decision every payday consistently outperform manual transfers. The most effective setup for a tight budget is one where the money moves before you can spend it.
If your employer allows it, a direct-deposit split is the cleanest solution: instruct payroll to send a fixed dollar amount, even $25, directly to a separate savings account every pay period. You never see it in checking, so you don’t miss it. Many hourly and shift-work employers offer this; it takes one HR form or a settings change in your payroll portal. Earned-wage access apps, which some low-income employers now provide as a benefit, can also be configured to hold back a small portion automatically. These tools are underused and genuinely useful.
Round-Up Apps and Micro-Transfers
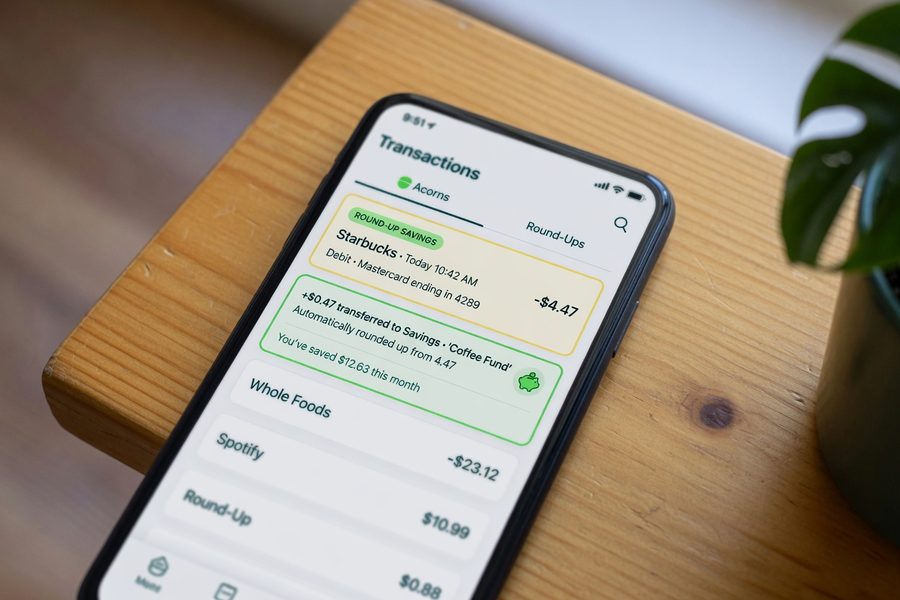
If direct-deposit splits aren’t available, round-up apps like Acorns or Chime’s round-up feature move small amounts into savings with each debit purchase, rounding up to the nearest dollar. These amounts are tiny per transaction but consistent. On a budget where the difference between saving and not saving is psychological friction, removing that friction matters. A separate savings account at a different bank, one without a debit card attached, adds one more layer of separation that helps reduce the temptation to dip in for non-emergencies.
Where to Park the Money Safely
Your emergency fund needs to be liquid, safe, and earning at least something. A basic savings account at a brick-and-mortar bank typically pays close to 0% interest, which means inflation quietly erodes your balance. High-yield savings accounts (HYSAs), offered by many online banks and credit unions, have been paying meaningfully higher rates. As of early 2026, rates remain well above what traditional banks offer, though they fluctuate with Federal Reserve policy.
The non-negotiables: your account should be FDIC-insured (or NCUA-insured for credit unions) up to $250,000, and you should be able to access the money within one to two business days. Certificates of deposit (CDs) often pay more, but locking up emergency funds in a CD defeats the purpose, you’d face penalties for early withdrawal at exactly the moment you need the money most. Stick with a liquid account.
The Rules for Actual Emergencies
Define what counts as an emergency before you need the money. True emergencies are unexpected, necessary, and urgent: a job loss, a medical expense, a car repair that prevents you from getting to work, a broken furnace in winter. A sale on concert tickets is not an emergency. A planned vacation is not an emergency. Setting this definition in writing, even just a note in your phone, reduces the rationalizations that slowly drain the fund. When you do make a legitimate withdrawal, treat rebuilding as the next immediate priority, not something to revisit later.
As the Consumer Financial Protection Bureau explains, an emergency fund is a cash reserve set aside for unplanned expenses or financial emergencies such as car repairs, home repairs, medical bills, or loss of income. Building one is one of the first steps to start saving.
Balancing Debt Payments and Emergency Savings
This is the question most emergency fund guides sidestep: if you’re carrying high-interest credit card debt, should you be saving at all? The mathematically optimal answer is usually to pay down high-interest debt first, since a 24% APR costs more than any savings rate earns. But the practically optimal answer is more nuanced.
Paying minimums only on credit card debt while directing even a small amount toward a starter fund is a reasonable short-term strategy. The reason is simple: if something breaks and you have no savings, you’ll go right back to the credit card to cover it, which is a cycle that makes the debt worse. Reaching a $500 or $1,000 starter fund first, then shifting to more aggressive debt repayment, gives you a backstop that prevents the cycle from repeating. For deeper guidance on managing existing balances while building savings, the approaches outlined in this guide to prioritizing and negotiating credit card debt are worth reviewing alongside your savings plan.
Making Peace With a Slower Timeline
Carrying debt while saving will always feel inefficient on paper. Accept that, and keep moving. The goal is not mathematical perfection; it’s building a financial position that doesn’t collapse when something goes wrong. Once your starter fund is in place and stable, you can shift the weight of extra dollars toward debt aggressively. The two goals are sequential, not competing.
Pausing debt payments entirely, even temporarily, can trigger late fees, penalty APRs, and credit score damage that cost more than the savings you accumulated. Always pay at least the minimum on every debt, every month, regardless of your savings plan.
Staying Consistent When Motivation Drops
Motivation is highest at the start and lowest three months in, when the novelty has worn off and the goal still feels far away. This is normal and predictable, and the solution is building structure that doesn’t rely on feeling motivated.
Visual progress tracking is genuinely effective, especially for goals that span months. A simple savings thermometer drawn on paper, a spreadsheet that updates automatically, or a savings app with a goal-tracking feature all serve the same purpose: making progress visible creates its own forward pull. Celebrating milestones, hitting $250, $500, $1,000, reinforces the behavior without requiring expensive rewards. Free activities work fine here; the acknowledgment itself is what matters.
Adjusting Without Quitting
Income dips happen. Hours get cut, freelance work dries up, unexpected costs appear. When that happens, the right move is to reduce the contribution temporarily, not to stop entirely. Saving $5 a week instead of $50 during a hard month keeps the habit alive and the account growing, even slowly. Stopping completely is harder to restart than slowing down. Think of it the way a physical therapist approaches recovery: you adjust the intensity, not the commitment.
For workers with irregular income, gig work, seasonal employment, shift-based hourly work, audit not just spending but income patterns. Track your actual take-home for three months. Identify your lowest-earning month and use that as your baseline for how much you can save consistently. Any month you earn above that baseline, direct a percentage of the overage to savings automatically. This approach smooths out the volatility without requiring a fixed amount that may be impossible some months.
The Consumer Financial Protection Bureau specifically highlights one-time cash windfalls, tax refunds, bonuses, and side income, as high-impact opportunities to jumpstart an emergency fund, particularly for households living paycheck to paycheck. A single tax refund directed entirely to a starter fund can cover months of incremental saving in one move.
When Your Target Number Changes
Reaching your three-month goal is a real achievement, but it’s not a permanent finish line. Rent increases, new dependents, a change in employment status, or significant inflation can make a fund that was adequate in 2024 genuinely insufficient in 2026. Revisit your bare-bones monthly expense calculation at least once a year and after any major life change. If your monthly baseline has risen, recalculate your three-month target and treat the gap as a new milestone.
This is also the moment to consider whether three months is still the right target or whether your situation now warrants pushing toward five or six. A fund you built on a tight budget is proof you can do it; rebuilding to a higher number from a position of existing savings is meaningfully easier than starting from zero.

| Savings Rate | Time to $1,000 Starter Fund | Time to $7,200 (3-Month Example) |
|---|---|---|
| $10/week | ~100 weeks (1.9 years) | ~720 weeks (13.8 years) |
| $25/week | ~40 weeks (9 months) | ~288 weeks (5.5 years) |
| $55/week | ~18 weeks (4 months) | ~131 weeks (2.5 years) |
| $138/week | ~7 weeks | ~52 weeks (1 year) |
Frequently Asked Questions
How much should I have in an emergency fund?
Financial experts recommend saving three to six months of bare-bones living expenses. For most people starting out, three months is a realistic and well-supported target. The Federal Deposit Insurance Corporation advises that at least six months of living expenses in a federally insured savings product is ideal for long-term protection.
Is it worth building an emergency fund if I have high-interest debt?
Yes, with a clear strategy. Paying at least the minimum on all debts while building a starter fund of $500 to $1,000 is effective. Without savings, any unexpected expense often forces reliance on credit cards, worsening debt. Once the starter fund is in place, you can shift focus to aggressively paying down high-interest debt.
What if my income is irregular or I work gig jobs?
Track your actual take-home pay over three months and use your lowest-earning month as your savings baseline. In higher-earning months, automatically save a percentage of the extra income. This method ensures consistency without requiring fixed contributions every pay period.
Where should I keep my emergency fund?
Use a high-yield savings account at an online bank or credit union. It should be FDIC or NCUA insured, have no monthly fees, and allow withdrawals within one to two business days. Avoid CDs, as early withdrawal penalties defeat the purpose of an emergency fund.
Can I use my emergency fund for planned expenses?
No. Emergency funds are for unplanned, necessary, and urgent expenses, such as job loss, medical bills, or essential car repairs. Planned expenses like vacations or new electronics should be saved for separately. The Consumer Financial Protection Bureau defines such reserves as essential for financial resilience.
How do I rebuild after using my emergency fund?
Restart automatic contributions immediately, even if it’s a small amount. Don’t wait until financial stability returns. Treat rebuilding like the original goal: set a new milestone, automate the transfer, and stay consistent. The sooner you restart, the quicker you regain protection.
What if I can only save $10 or $20 a week?
Start there. Saving $10 per week adds up to $520 in a year, enough for a meaningful starter fund. The key isn’t the amount, but the consistency. Over time, this habit builds resilience, and any future increase in savings becomes easier to sustain.
How much of my income should I save toward an emergency fund?
There’s no one-size-fits-all percentage. The most effective approach is based on your actual income and bare-bones expenses. Focus on what’s sustainable: even $5 or $10 per week is a step forward. The goal is consistency over time, not large upfront commitments.
Is it too late to start building an emergency fund now?
No. It’s never too late. The fact that only 55 percent of U.S. adults had enough savings to cover three months of expenses in 2024 shows that millions are starting from zero. The first step, defining your target and setting up a small, automatic transfer, is all you need to begin the journey.
How can I stay motivated when progress feels slow?
Use visual progress trackers, celebrate small milestones with free rewards, and remember that every dollar saved is a step toward financial security. The Consumer Financial Protection Bureau emphasizes that building an emergency fund is one of the first steps to financial resilience, and consistency matters more than speed.
Financial experts generally recommend having at least six months of living expenses in a federally insured product such as a savings account to build an emergency savings fund using regular automated deposits.
Sources
- Federal Reserve, Report on the Economic Well-Being of U.S. Households in 2024: Savings and Investments
- Federal Reserve, Survey of Household Economics and Decisionmaking (SHED) Data Visualization: Emergency Savings
- Bankrate, Annual Emergency Savings Report 2026
- Consumer Financial Protection Bureau, An Essential Guide to Building an Emergency Fund
- TD Bank Stories, When Life Throws a Curveball: Tips on How to Build an Emergency Fund on a Tight Budget
- Fortune, How to Build an Emergency Fund (Expert Advice)
- Federal Deposit Insurance Corporation, Deposit Insurance Overview and Coverage Limits
- MyFinancial101, Credit Card Debt: How to Prioritize and Negotiate with Creditors
- MyFinancial101, Rising Poverty Guidelines in 2026: Who Benefits Now?
- MyFinancial101, Micro-Freelancing Surges
- MyFinancial101–$19+ Hourly Jobs Hiring Now: Where Opportunity Still Exists in Early 2026